Using OpenAI models hosted on Microsoft Azure has a number of benefits , most notably greater scalability and reliability.
However, the learning curve to get it all set up can be quite steep.
This step-by-step guide shows everything you need to do get up and running.
Note that if you're a Vellum customer, you can use the resulting model in Vellum like you would any other!
Prerequisites
If you haven't already, sign up for a Microsoft Azure account by going here . Then, apply for access to Azure OpenAI service by filling out the form here .
Proceed with the remaining steps once you've been notified that your access has been granted.
Configuring OpenAI on Azure
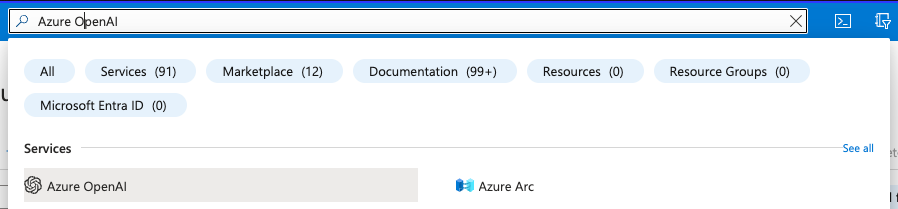
Navigate to Azure AI Services
First navigate to the Azure OpenAI page within Azure AI services.
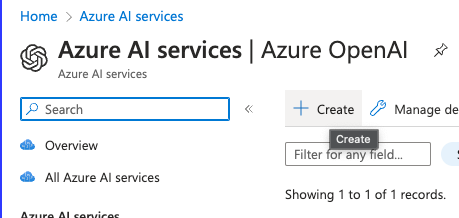
Create a Resource
Once you are on the Azure OpenAI page, click the “Create” button on the top left of the dashboard. This is a Azure resource that could host multiple different OpenAI models.
Choose the Resource’s Name
Fill out the Basics section, specifying the project and region this model will be used in. Choose a custom name that will serve as your resource’s identifier.

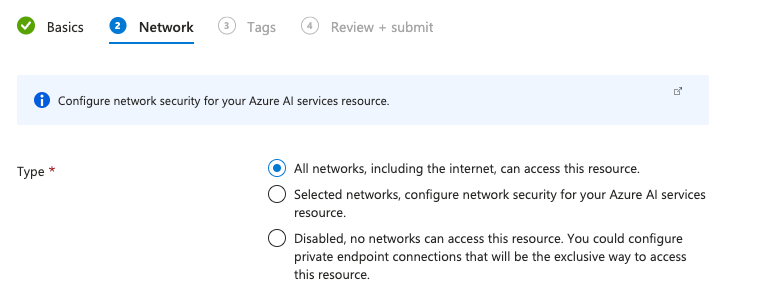
Choose Network Type
Select the network that will have access to the model. "All networks" should be sufficient if you don’t have any additional VPNs configured.
Add Any Relevant Tags
Azure tags are helpful for grouping related resources on your Azure account. If you don’t plan to have any tags set up yet, click Next to continue.
Tags can always be added and edited later.

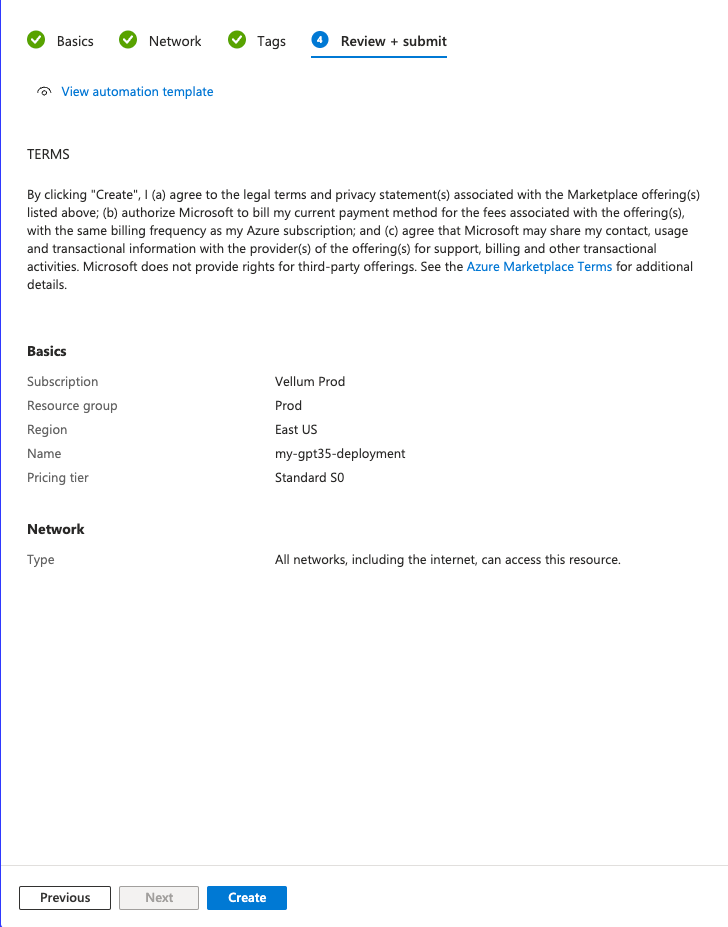
Review & Create
Review your endpoint settings to make sure it looks as expected and click “Create” when ready. This will start deploying your endpoint, which will be the container for whichever OpenAI models you’d like to stand up.
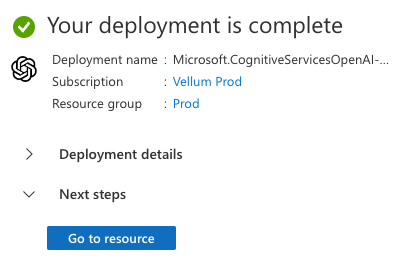
Go to Resource
Once the deployment is complete, click the “Go to resource” button below to start setting up the model itself.
Go to Azure OpenAI Studio
Once you’re on the resource, click the tab towards the top of the page to take you to Azure OpenAI Studio.

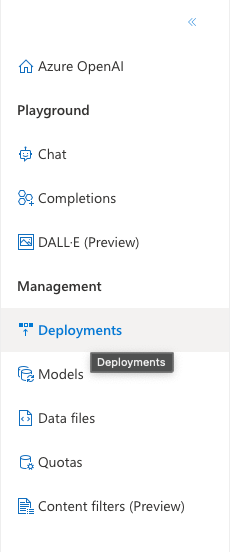
Navigate to the Deployments Tab
On the left sidebar, click on the Deployments tab.
Create new Deployment
Click on the "Create new deployment" button towards the top of the dashboard.

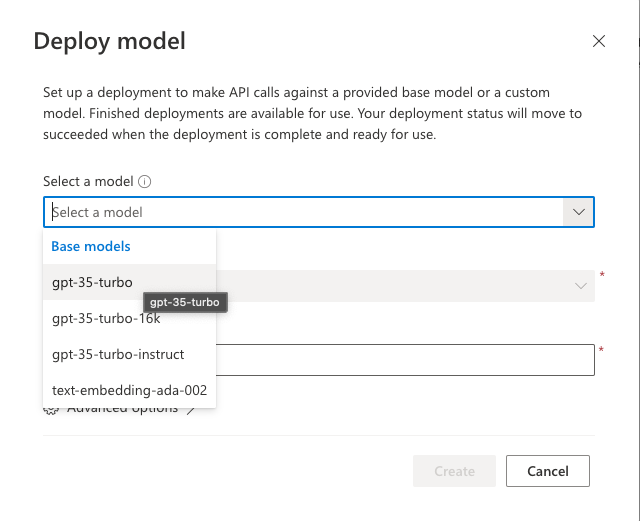
Fill out Deploy model form
Fill out the Deploy model form by selecting a model and assigning it a Deployment name. Save the model and deployment name entered as you will need to refer to it in your code or when adding the model to Vellum.
Click Create when ready.
Navigate to Endpoints
Head back to your main deployment page and click on the link to view endpoints.

Copy Endpoint URL and API Key
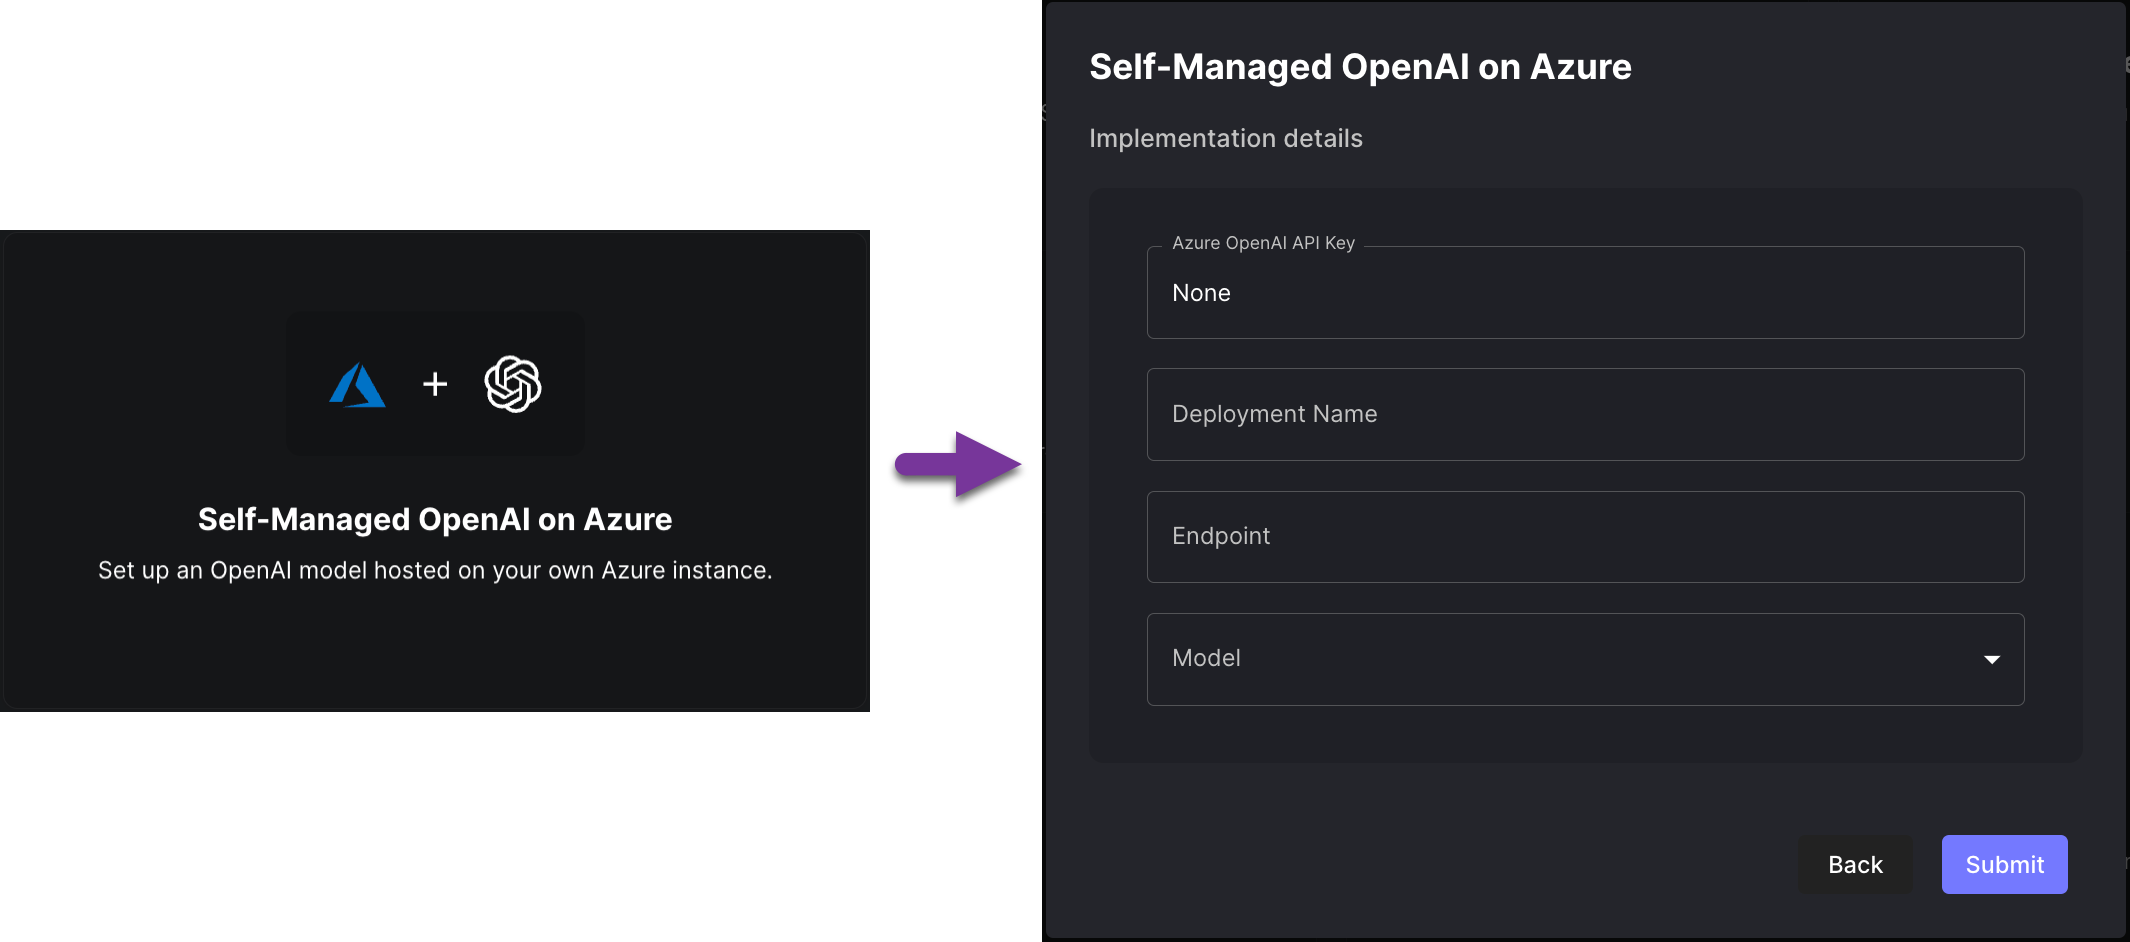
Copy the endpoint URL and Key 1 and enter both of those values below. You again need both to reference in your code, or when adding the model to Vellum .

Integrating w/ Your Newly Deployed Model
You now have a ready-to-go OpenAI model hosted on Microsoft Azure. For more info on how to integrate with Microsoft's API directly, see here . If you're a Vellum customer, you'll probably want to use your newly deployed model through Vellum . This way, you can benchmark it against existing models, run evaluations against it, and use it from within Workflows or Prompt Deployments.
To take advantage of these benefits, you'll need to add this model to Vellum via the models page . On this page you'll find an option to securely enter your model details.
And here's a demo video of how to use Azure-hosted OpenAI models directly from within Vellum.
Once added, you'll see this model throughout Vellum and can use it like you would any other!